Using custom connectors
If our connector catalog does not fulfill your needs, you can build your own Airbyte connectors. There are two approaches you can take while jumping on connector development project:
- You want to build a connector for an external source or destination (public API, off-the-shelf DBMS, data warehouses, etc.). In this scenario, your connector development will probably benefit the community. The right way is to open a PR on our repo to add your connector to our catalog. You will then benefit from an Airbyte team review and potential future improvements and maintenance from the community.
- You want to build a connector for an internal source or destination (private API) specific to your organization. This connector has no good reason to be exposed to the community.
This guide focuses on the second approach and assumes the following:
- You followed our other guides and tutorials about connector developments.
- You finished your connector development, running it locally on an Airbyte development instance.
- You want to deploy this connector to a production Airbyte instance running on a VM with docker-compose or on a Kubernetes cluster.
If you prefer video tutorials, we recorded a demo about uploading connectors images to a GCP Artifact Registry.
1. Create a private Docker registry
Airbyte needs to pull its Docker images from a remote Docker registry to consume a connector. You should host your custom connectors image on a private Docker registry. Here are some resources to create a private Docker registry, in case your organization does not already have one:
| Cloud provider | Service name | Documentation |
|---|---|---|
| Google Cloud | Artifact Registry | Quickstart |
| AWS | Amazon ECR | Getting started with Amazon ECR |
| Azure | Container Registry | Quickstart |
| DockerHub | Repositories | DockerHub Quickstart |
| Self hosted | Open-source Docker Registry | Deploy a registry server |
2. Authenticate to your private Docker registry
To push and pull images to your private Docker registry, you need to authenticate to it:
- Your local or CI environment (where you build your connector image) must be able to push images to your registry.
- Your Airbyte instance must be able to pull images from your registry.
For Docker-compose Airbyte deployments
On GCP - Artifact Registry:
GCP offers the gcloud credential helper to log in to your Artifact registry.
Please run the command detailed here to authenticate your local environment/CI environment to your Artifact registry.
Run the same authentication flow on your Compute Engine instance.
If you do not want to use gcloud, GCP offers other authentication methods detailed here.
On AWS - Amazon ECR:
You can authenticate to an ECR private registry using the aws CLI:
aws ecr get-login-password --region region | docker login --username AWS --password-stdin aws_account_id.dkr.ecr.region.amazonaws.com
You can find details about this command and other available authentication methods here.
You will have to authenticate your local/CI environment (where you build your image) and your EC2 instance where your Airbyte instance is running.
On Azure - Container Registry:
You can authenticate to an Azure Container Registry using the az CLI:
az acr login --name <registry-name>
You can find details about this command here
You will have to authenticate both your local/CI environment/ environment (where your image is built) and your Azure Virtual Machine instance where the Airbyte instance is running.
On DockerHub - Repositories:
You can use Docker Desktop to authenticate your local machine to your DockerHub registry by signing in on the desktop application using your DockerID. You need to use a service account to authenticate your Airbyte instance to your DockerHub registry.
Self hosted - Open source Docker Registry:
It would be best to set up auth on your Docker registry to make it private. Available authentication options for an open-source Docker registry are listed here.
To authenticate your local/CI environment and Airbyte instance you can use the docker login command.
For Kubernetes Airbyte deployments
You can use the previous section's authentication flow to authenticate your local/CI to your private Docker registry. If you provisioned your Kubernetes cluster using AWS EKS, GCP GKE, or Azure AKS: it is very likely that you already allowed your cluster to pull images from the respective container registry service of your cloud provider. If you want Airbyte to pull images from another private Docker registry, you will have to do the following:
- Create a
Secretin Kubernetes that will host your authentication credentials. This Kubernetes documentation explains how to proceed. - Set the
JOB_KUBE_MAIN_CONTAINER_IMAGE_PULL_SECRETenvironment variable on theairbyte-workerpod. The value must be the name of your previously created Kubernetes Secret.
3. Push your connector image to your private Docker registry
- Build and tag your connector image locally, e.g.:
docker build . -t my-custom-connectors/source-custom:0.1.0 - Create your image tag with
docker tagcommand. The structure of the remote tag depends on your cloud provider's container registry service. Please check their online documentation linked at the top. - Use
docker push <image-name>:<tag>to push the image to your private Docker registry.
You should run all the above commands from your local/CI environment, where your connector source code is available.
4. Use your custom connector in Airbyte
At this step, you should have:
- A private Docker registry hosting your custom connector image.
- Authenticated your Airbyte instance to your private Docker registry.
You can pull your connector image from your private registry to validate the previous steps. On your Airbyte instance: run docker pull <image-name>:<tag> if you are using our docker-compose deployment, or start a pod that is using the connector image.
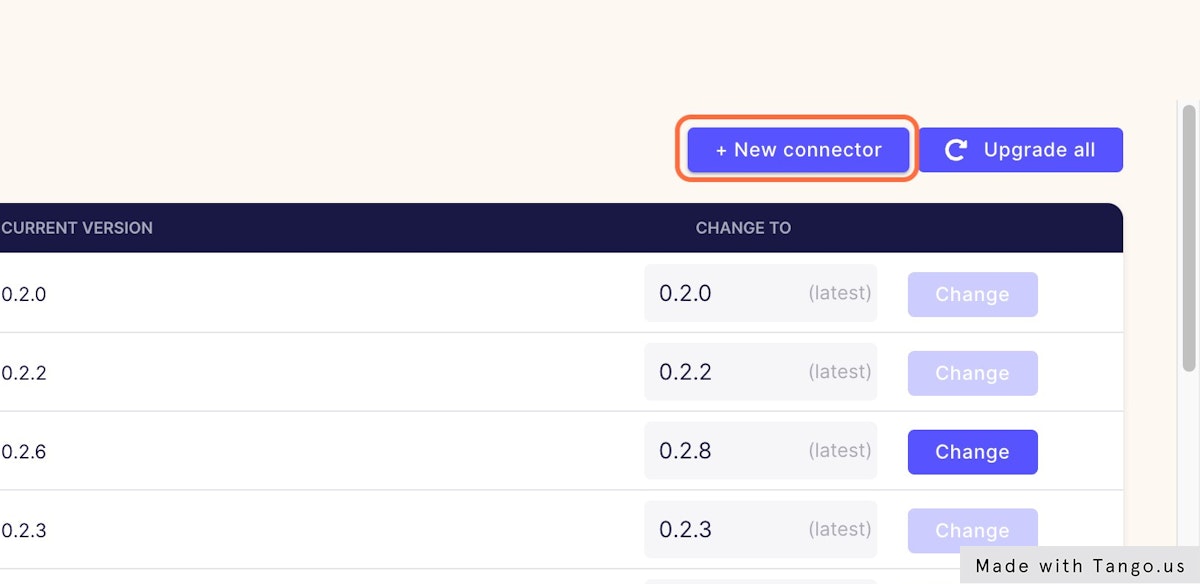
1. Click on Settings

2. Click on Sources (or Destinations)

3. Click on + New connector
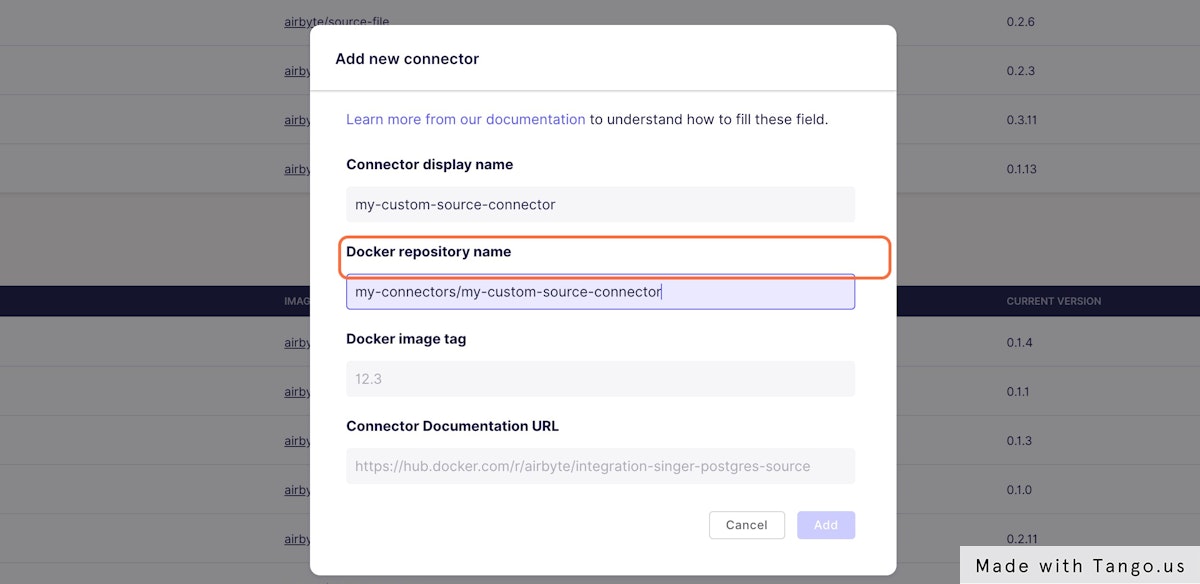
4. Fill the name of your custom connector
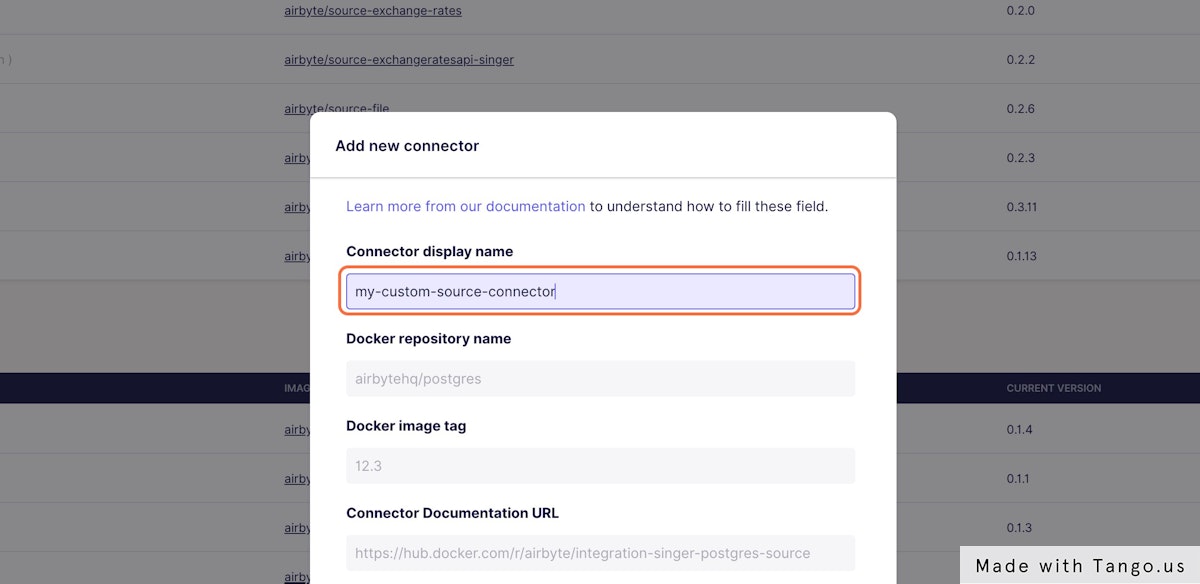
5. Fill the Docker image name of your custom connector
6. Fill the Docker Tag of your custom connector image
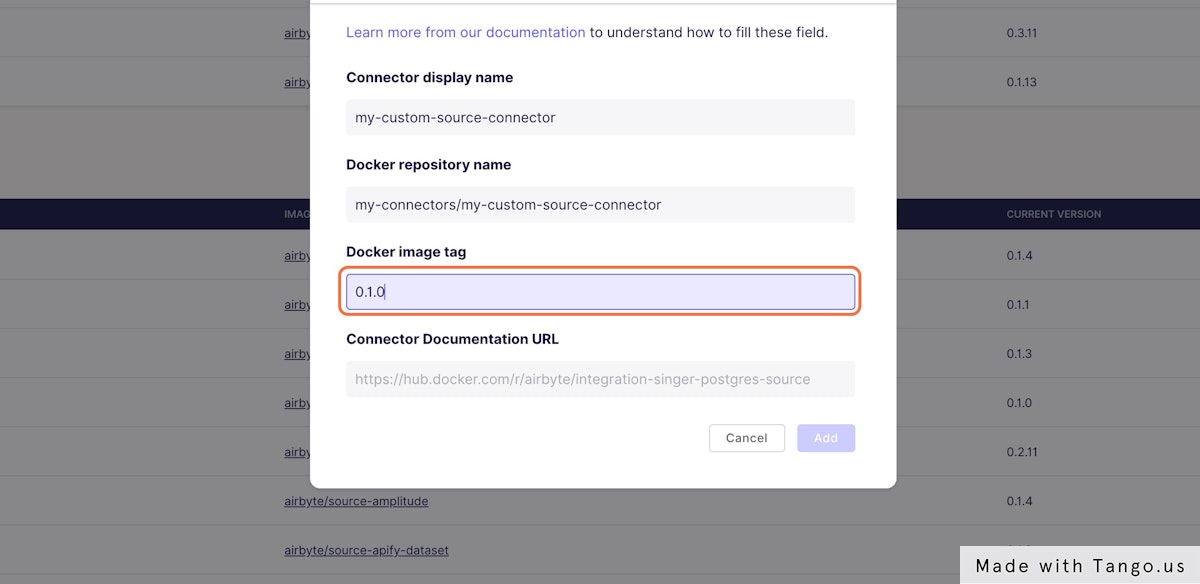
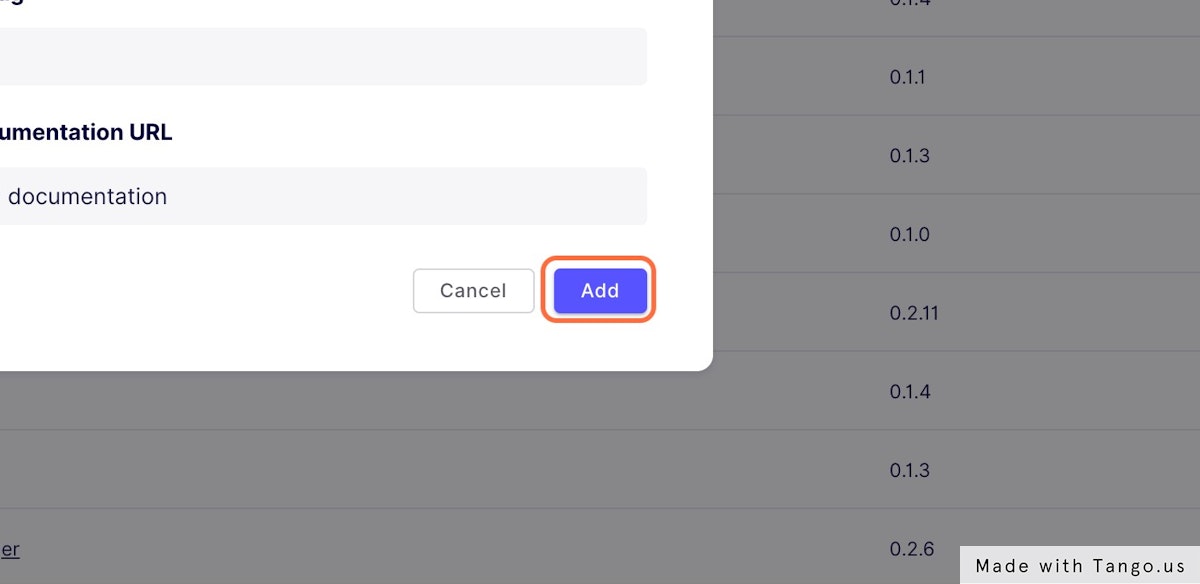
7. Fill the URL to your connector documentation
This is a required field at the moment, but you can fill with any value if you do not have online documentation for your connector.
This documentation will be linked in the connector setting page.